Learn how to tape a shoulder safely for support, stability, and pain relief with this simple, step-by-step guide anyone can follow.
How to tape a shoulder: Clean the skin, position the arm correctly, and apply kinesiology or athletic tape along key shoulder muscles to support movement and reduce strain. Proper taping can improve stability, but it doesn’t replace medical care.
I first thought my shoulder pain was just “sleeping funny.” You know that dull ache that feels like a bad pillow choice? But then it stayed. It followed me into workouts, into grocery shopping, even into the simple act of reaching for a mug.
That’s when I noticed athletes with colorful tape on their shoulders. It looked like decoration at first. Then curiosity kicked in. Could a few strips of tape really change how a shoulder feels?
Learning how to tape a shoulder felt oddly personal, like learning how to listen to a joint that had been quietly complaining for months. And the more I learned, the more I realized shoulder taping isn’t magic. It’s support. It’s feedback. It’s a gentle reminder to your body: move smarter.
Let’s figure this out together.
What You'll Discover:
Why People Learn How to Tape a Shoulder
Learning how to tape a shoulder usually starts with discomfort. But the reasons go deeper.
A shoulder is one of the most mobile joints in the body. Mobility is freedom. But it’s also vulnerability. More movement means more chances to strain something.
People tape shoulders for:
- Mild muscle strains
- Rotator cuff irritation
- Posture-related pain
- Sports support (lifting, throwing, swimming)
- Recovery after minor injuries
Here’s a quotable truth:
“The shoulder sacrifices stability for mobility more than almost any other joint.”
That trade-off is why support strategies like taping exist.
But here’s the contradiction: taping can help, yet it can’t fix poor habits. If you overload your shoulder daily, tape becomes a bandage on a lifestyle.
How Shoulder Taping Actually Works
Before learning how to tape a shoulder, it helps to know why it works at all.
Taping does three main things:
1) Sensory Feedback
Tape gently pulls on the skin. That pull talks to your nervous system. It says, “Hey, notice this area.”
This awareness can subtly change how you move.
2) Light Support, Not Immobilization
Good taping supports movement without locking the joint. It’s not a brace. It’s more like a guide rail.
3) Circulation Support
Some believe kinesiology tape slightly lifts the skin, which may help blood and lymph flow. Evidence is mixed, but many people report reduced swelling.
A simple quote-friendly line:
“Tape doesn’t make you stronger; it helps you move smarter.”
Types of Tape You Can Use
Not all tape is created equal. Choosing the wrong one can turn a helpful tool into a sticky mess.
Kinesiology Tape
- Stretchy and flexible
- Designed for movement
- Can be worn for days
- Common in sports and rehab
Best for: general support and daily wear.
Athletic (Rigid) Tape
- Strong and non-stretchy
- Limits movement more
- Usually worn short-term
Best for: higher stability needs.
KT Tape vs. Cheap Alternatives
Cheap tape often loses stickiness fast. Sweat and movement win. If tape peels early, support disappears.
Sometimes saving money costs support.
When You Should NOT Tape a Shoulder
This part matters more than most people expect.
Do not tape if you have:
- Open wounds or skin infections
- Severe pain or suspected dislocation
- Numbness or tingling down the arm
- Known tape allergies
- Significant swelling without diagnosis
And the honest sentence many skip:
“If your shoulder pain is sharp, worsening, or persistent, tape is not a solution, a professional is.”
Taping is support, not treatment.
How to Tape a Shoulder: Step-by-Step
Now the practical part. This is a general support method, not a medical prescription.
Step 1: Prep the Skin
Clean and dry skin matters. Oils and sweat ruin adhesion.
If needed:
- Trim hair
- Avoid lotion
- Use rubbing alcohol to clean
Good tape starts with good prep.
Step 2: Position the Arm
Raise your arm slightly or move it across your body. This stretches the shoulder muscles gently.
Tape works best when applied over a slightly stretched muscle.
Step 3: Anchor Strip (No Stretch)
Place the first strip from the upper arm (deltoid area) toward the top of the shoulder.
No stretch at the ends. Anchors should be gentle.
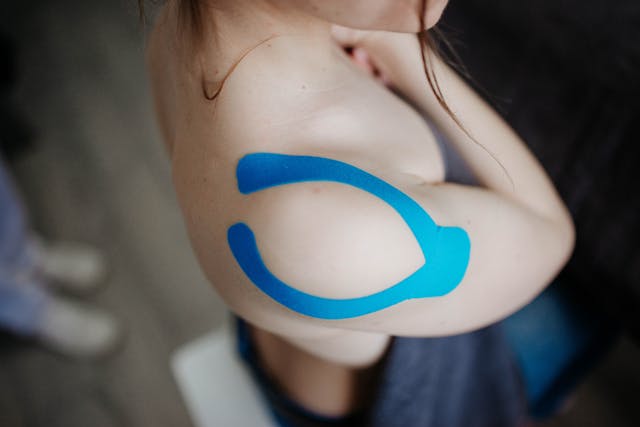
Step 4: Support Strips
Add strips:
- From front shoulder toward the back
- Along the shoulder blade direction
- Over sore areas with mild stretch (about 25–50%)
Think of it like reinforcing a bridge, not wrapping a package.
Step 5: Rub to Activate Adhesive
Heat activates glue. Rub the tape lightly.
Simple but important.
Common Mistakes When Learning How to Tape a Shoulder
Most people get these wrong at first. I did too.
Pulling Too Tight
More tension ≠ more support. Too tight can irritate skin or restrict circulation.
Ignoring Pain Signals
If tape increases pain, remove it. Support should feel helpful, not restrictive.
Bad Placement
Random strips rarely help. Direction matters. Muscle lines matter.
Expecting Instant Healing
Tape supports. It doesn’t repair tissue.
A Real-World Analogy
Taping a shoulder is like using GPS while driving. It doesn’t drive the car for you. It guides you away from bad turns.
Your habits still determine the journey.
Comparison: Kinesiology Tape vs Athletic Tape
| Feature | Kinesiology Tape | Athletic Tape |
|---|---|---|
| Stretch | High | None |
| Comfort | High | Moderate |
| Wear Time | 3–5 days | Hours |
| Movement | Encourages | Restricts |
| Best For | Rehab & daily use | Injury stabilization |
Neither is “better.” They serve different purposes.
How Long Should You Wear Shoulder Tape?
Typical wear time:
- Kinesiology tape: 3–5 days
- Athletic tape: during activity only
Remove if:
- Skin gets irritated
- Pain increases
- Tape peels badly
Your skin’s opinion matters.
The Emotional Side of Shoulder Pain
This might sound strange, but shoulder pain can be emotional.
Your shoulders carry bags, posture, stress, even tension. Ever noticed how stress makes you hunch?
Learning how to tape a shoulder sometimes becomes a reminder to treat your body kindly.
A reflective line worth quoting:
“Pain often whispers before it screams.”
Taping is listening to the whisper.
Prevention: The Part Most Skip
Taping helps. Prevention helps more.
Focus on:
- Strengthening rotator cuff muscles
- Improving posture
- Taking breaks from overhead work
- Stretching chest and shoulders
Support without prevention is a loop.
FAQ
Is it safe to tape your own shoulder?
Yes, for mild support. But severe pain or injury should be evaluated by a professional.
How tight should shoulder tape be?
Snug but comfortable. You should never feel numbness or tingling.
Can shoulder taping fix a rotator cuff tear?
No. It may provide support, but tears need medical care and rehab.
How often can I tape my shoulder?
You can tape regularly if your skin tolerates it. Give skin breaks between applications.
Does color of kinesiology tape matter?
No. Color is cosmetic. Support comes from application, not appearance.
Key Takings
- Learning how to tape a shoulder is about support, not healing.
- Proper placement and moderate tension matter most.
- Kinesiology tape supports movement; athletic tape restricts it.
- Shoulder taping works best alongside exercise and posture fixes.
- Pain that persists needs professional evaluation.
- Tape is a guide, not a cure.
- Listening to your shoulder early prevents bigger problems.


